Install tracking on ads
Set up Facebook ads
Go to your Facebook Ads Manager, and go to Ads tab.
Select all ads using the checkbox in the header and click on Edit ads. This will edit all ads, in bulk
Copy this code fbadid={{ad.id}}&fbadname={{ad.name}} and paste it in the URL parameters field
If you have other parameters, such as utm_campaign={{fb.campaign_name}}&source=facebook , merge them by adding &fbadid={{ad.id}}&fbadname={{ad.name}}
Don’t forget to save the new change
Next, make sure to integrate Facebook if you haven’t done that already!
Set up Google ads
Go to your Google Ads Manager, and go to Ads section.
Click on the Tools icon and click on Scripts ( under Bulk Actions ) and click on the plus icon to create a new script.
Copy the code below and paste in the new script
  function main() {
            var adIterator = AdsApp.ads().get();
                while (adIterator.hasNext()) {
                var ad = adIterator.next();
                var adgroup = ad.getAdGroup().getName().replace(/[^a-zA-Z0-9- ]/g, "");
                var campaign = ad.getCampaign().getName().replace(/[^a-zA-Z0-9- ]/g, "");
                //var adHeadline = ad.getLongHeadline().replace(/[^a-zA-Z0-9- ]/g, "");
                var adID = ad.getId();
                var name = campaign + " " + adgroup+ " " + adID;
                name = name.replace(/\s/g,'-');
                //Logger.log( name );
                ad.getCampaign().urls().setCustomParameters({adname:name});
            }
  }
Don’t forget to name the script, for example “Atlass ad name generator” and click on save. Before navigating, make sure to click run.
Next, go to All campaigns, click on Settings button, then Account settings and open the tracking section.
Copy this code {lpurl}?gadid={creative}&gadname={_adname} and paste it in the Tracking Template field
Don’t forget to save the new change
Now, make sure to set up the Google Ads integration if you haven’t done that already.
Set up TikTok ads
Go to your TikTok Ads Manager, and go to Ads tab.
Select all ads using the checkbox in the header and click on Edit ads. This will edit all ads, in bulk
Add the following parameters to the URL of every add: ttadid=__CID__&ttadname=__CID_NAME__
Don’t forget to save the new change
Now, make sure to set up the TikTok integration, if you haven’t done that already
Set up Email Tracking
Go to your Email Service provider and edit the email templates in use.
Edit the CTA link within the body of the email
Add the tracking parameters to the existing link ?atl_campaign=%email.subject%
First make sure you change the %email.subject% , depending on your ESP.
For MailChimp, use he code below:
( More details here )
For ActiveCampaign, use he code below:
( More details here )
For Drip, use he code below:
For ConvertKit, use the code below:
For Klaviyo, use the code below:
For Aweber, use the code below:
For SendGrid, use the code below:
Don’t forget to save the new change
Set up integrations
OpenCart integration
The OpenCart integration will sync all sales instantly and our algorithm will analyze and attribute those sales to the relevant ad.
So let’s plug it in.
First, download our OpenCart extension from the link below.
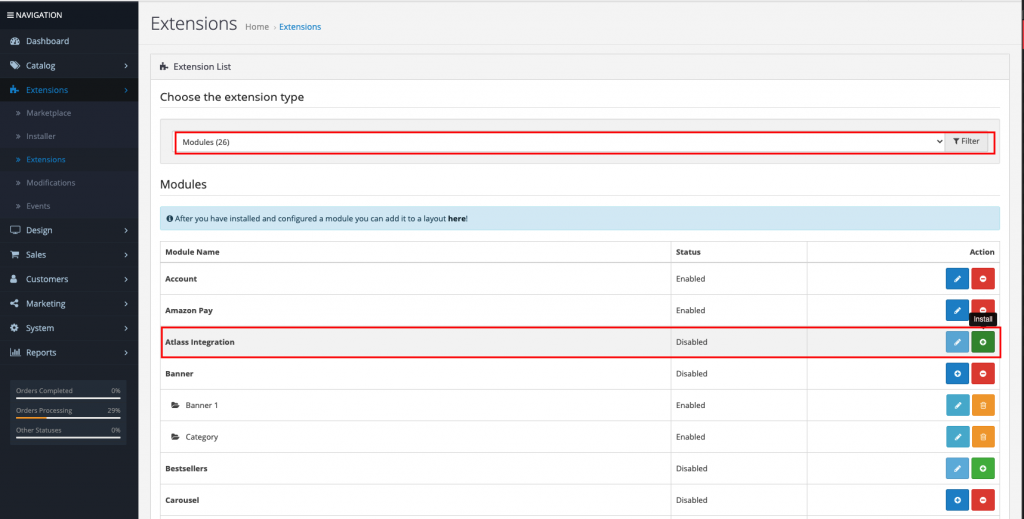
Head over to your OpenCart admin, go to Extensions -> Installed and upload the atlass.ocmod.zip file. After it was uploaded, head over to Extensions -> Extensions and choose Modules from the Choose Extension Type filter.
You should see the Atlass Integration listed there. Click on the + icon to install the extension.
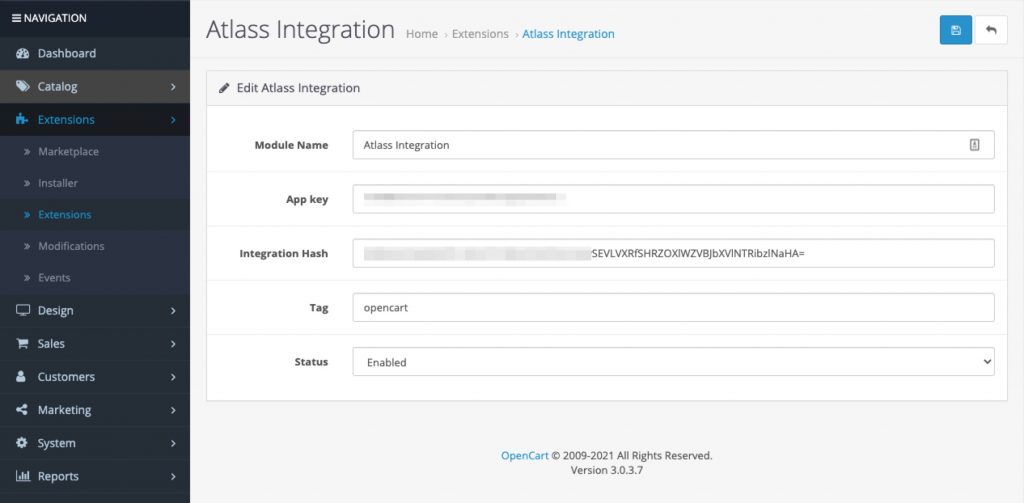
After it was installed, click on the pencil icon to edit it.
Next, from your Atlass account, go to the Integrations page, click on OpenCart and then on Add New Integration.
Add your store’s URL, ( https://yourdomain.com ) and click Save.
Once the integration is successful, you should see 2 keys generated, the App Key and the Hash Key.
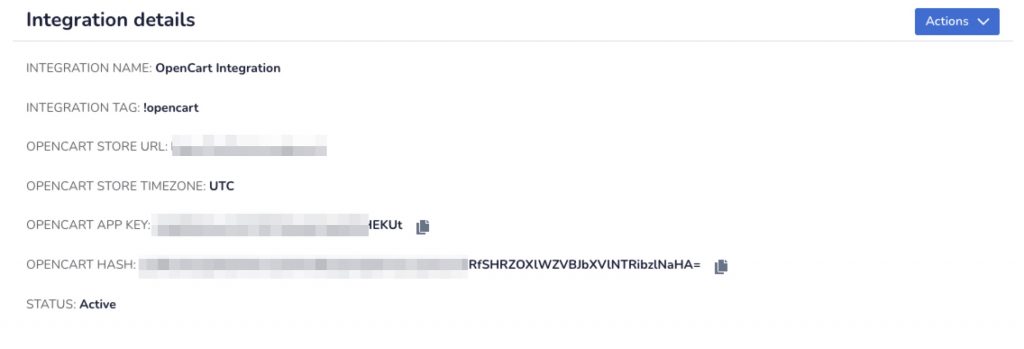
Copy both keys in your OpenCart newly created Module. You can also change the tag ( this tag will be applied to all sales from OpenCart, which will help segment the customers when having multiple stores for example ).
Now, go back to the integration and configure the statues. Since OpenCart has the option to add custom statuses for orders, we need to configure them to they align with your imported sales.
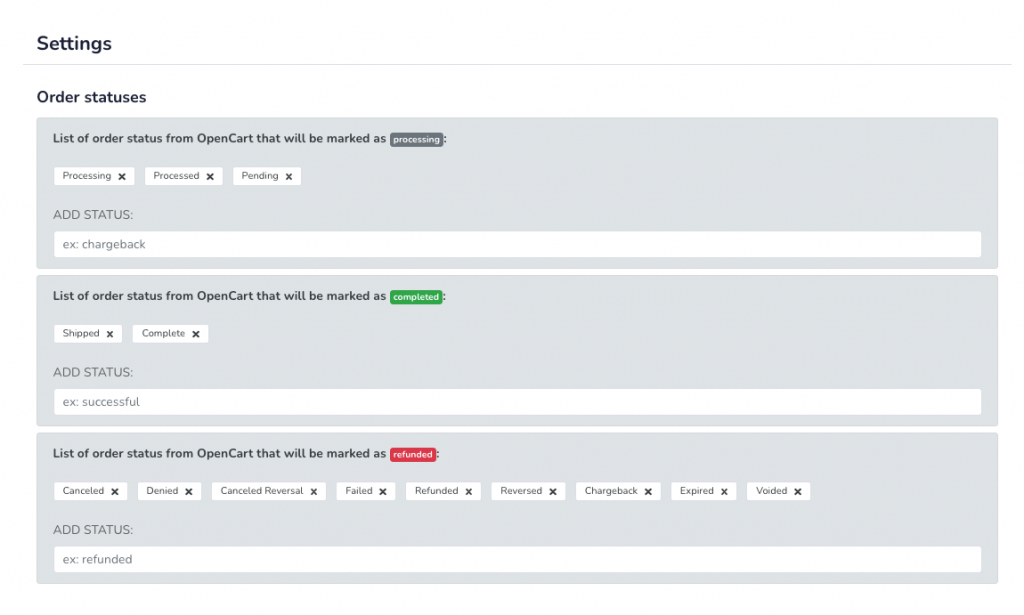
That’s it, integration should be done now.