We all know that customers don’t always purchase a product or service from the first interaction. They usually need 7-8 interactions ( touchpoints ) to make a purchase.
However, sometimes, they might need a little push in order to act. I’m gonna show you how to do that using email automations.
We don’t actually send the email to them using our platform, we only segment them into lists or tags.
How automation rules work?
These rules can help you retarget your customers with upsells and can give them a little push to convert, which will increase your sales and revenue without spending more money.
How automation rules work?
Automation rules will automatically add your customers into different lists in SendGrid based on specific tags.
Atlass uses different tags to define different actions or segment leads. Read more about tags here.
Let’s say for example, that you have a sales page and you offer a free e-book to everyone who enters their email. Or you want to send an upsell email to someone who purchased something.
Step 1:
Go into your SendGrid account, to Marketing -> Contacts and create a new list. Then, go to Automations and create a new automation and add all the emails you want for that sequence.
Step 2:
Locate your thank you page url: the URL the users are redirected after signing up. ( https://yourdomain.com/sales-page/thank-you ). Copy the thank you page url and go to your Atlass account and create an automation for that link.
Set up automations
Automations are steps that track the position of a customer in a funnel. They work similarly to IFTTT rules ( If This Then That ).
First, go to Setup -> Automations and create a new automation:
- First, we set up a word or phrase to be identified in the link
- Then, we set up Name and tag we want it applied to the lead that reach that URL link
- If the URL link has that phrase within, the lead will be applied the set tag
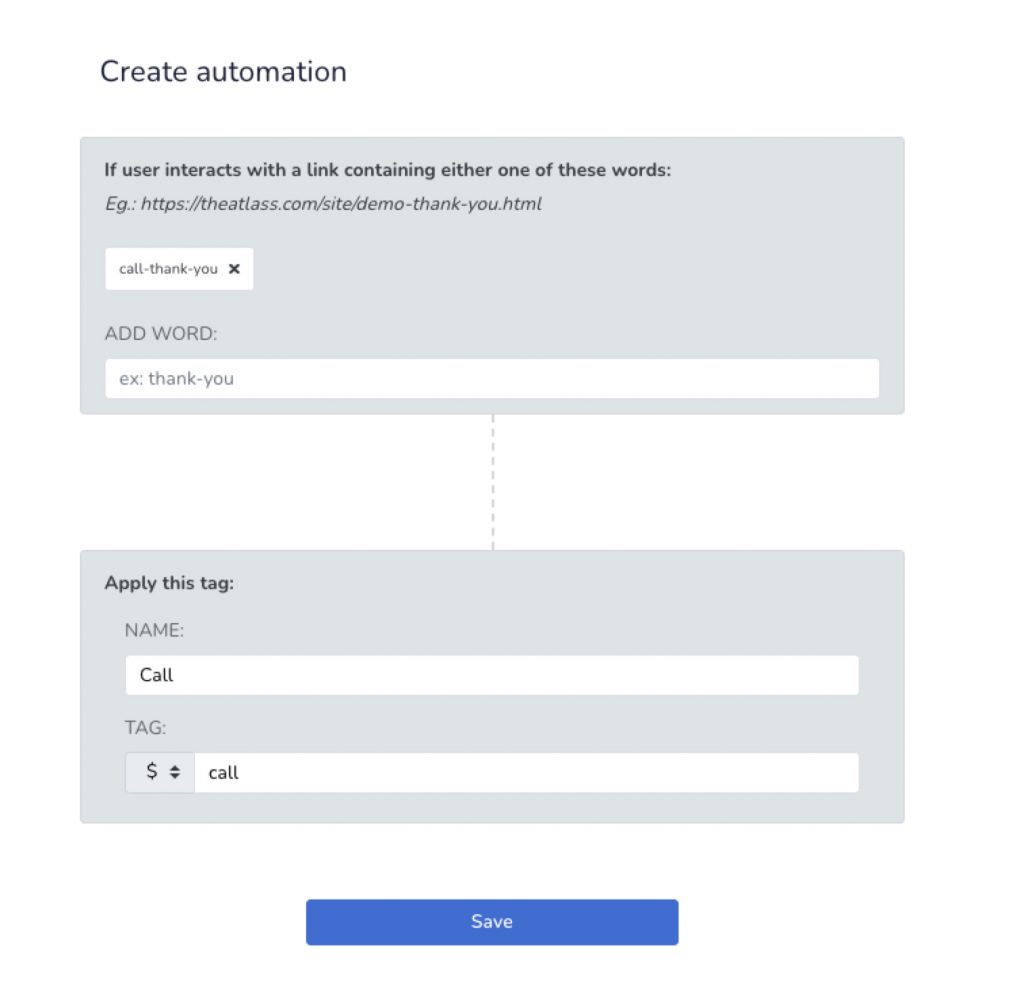
This will apply that set tag to everyone who lands on that page.
Step 3:
Now that’s set up and every lead that signs up and lands on that page are being tagged accordingly, let’s connect with SendGrid and synchronize them.
Go to your Atlass account and integrate SendGrid, if you haven’t already. Details on how to do that are listed below:
SendGrid Integration
The SendGrid integration will allow you to segment your customers into lists using tag and add them to SendGrid automations.
So let’s plug it in.
First, go to the Integrations page and click on SendGrid then click on the Create new button.
You will be prompted to add the account API Key in order to connect the two.
Now head to your SendGrid account, under Settings -> API Keys and click on Create API Key on the top right hand side. Set a name and make sure to have Full Access permissions set and click Create & View
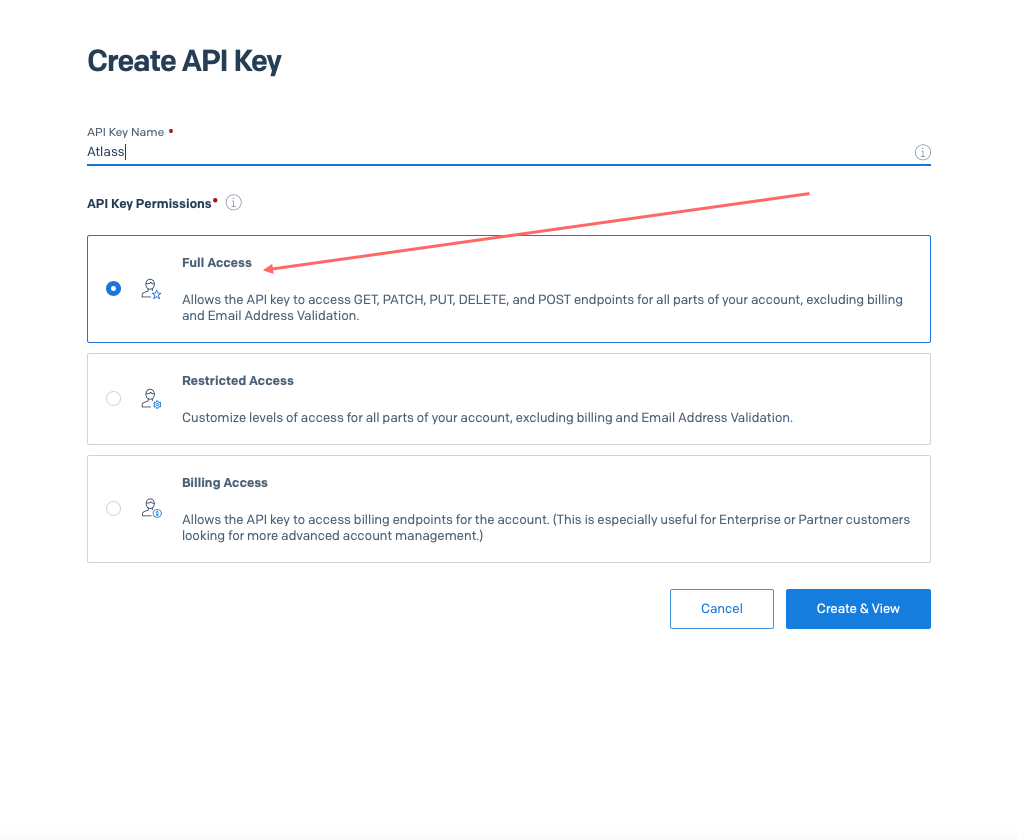
Copy the newly generated API Key, then head back to your Atlass account, paste it in the designated field and click save.
That’s it, your SendGrid account is not connect to your Atlass account.
If you want to set retarget your customers with emails or add them to different automations, you can do that with automated rules. Follow the link below
Step 4:
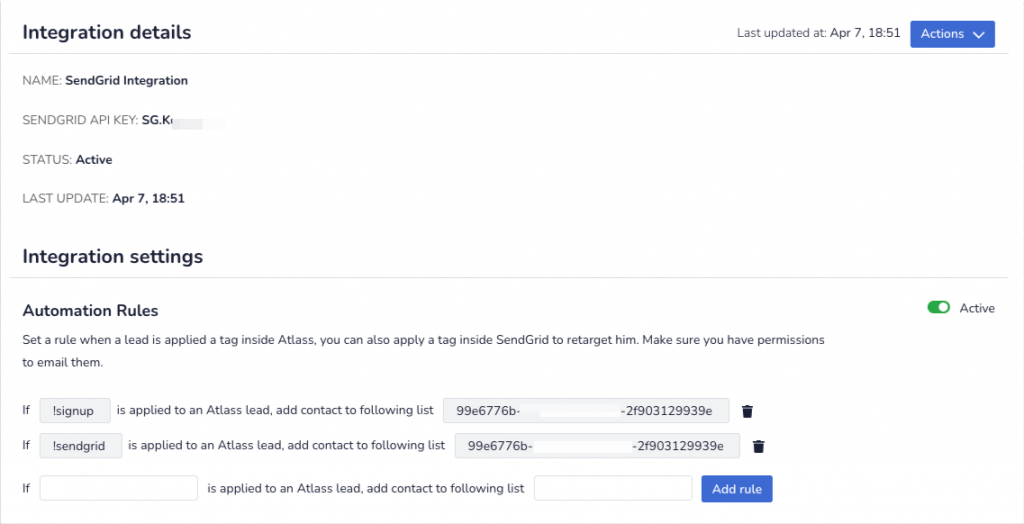
Now let’s create the automation rules. First, get the tag you set at Step 2 above and add it in the first field of the rule, after “If”:
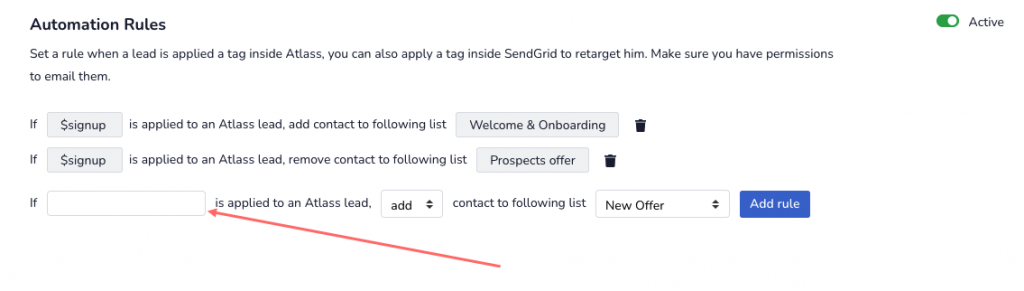
Then, choose an action for your rule, to either add a lead to a list or remove them from a list ( for example, if someone converted, you might want to remove them from the buying sequence and add them to a different one )
Next, select the list you want to add / remove the lead and click on Add rule.
That’s it. Now everyone who signs up will be added instantly to the email automation in SendGrid.